
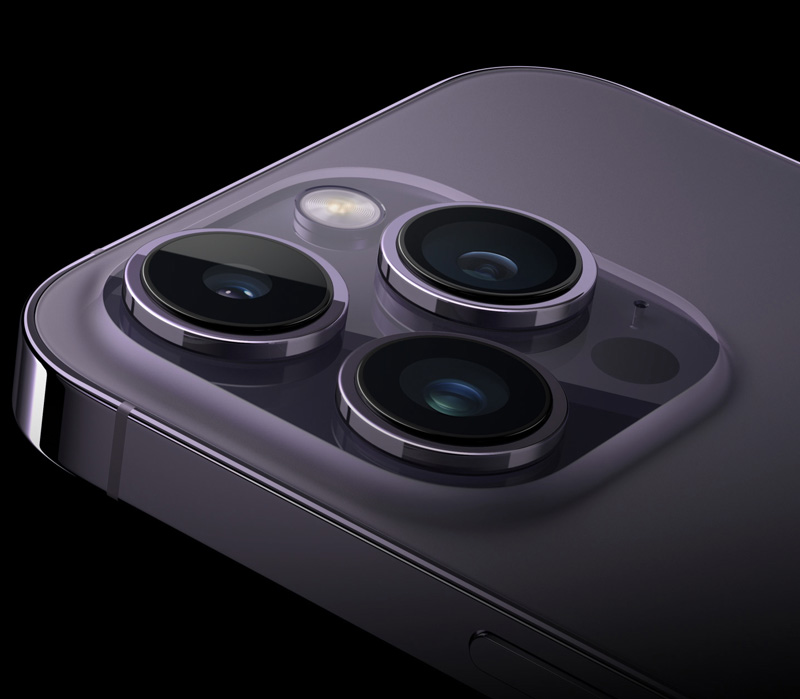
iPhone 14 Pro Max Camera Tips. The all-new iPhone 14 Pro and iPhone 14 Pro Max come with an extraordinarily competent Camera and app. Here’s how to get the finest possible photos. The iPhone 14 Pro and iPhone 14 Pro Max both have three cameras on the rear. The main camera has a 48MP wide-angle lens, as well as a 12MP ultra-wide lens and a 12MP telephoto lens.
iPhone 14 Pro Max Camera Tips
Apple has improved the camera this year with a redesigned Photonic Engine, Action Mode, and other features. Let’s take a look at the ever-expanding feature list of Apple’s latest pro iPhones.
1. Zooming in and out
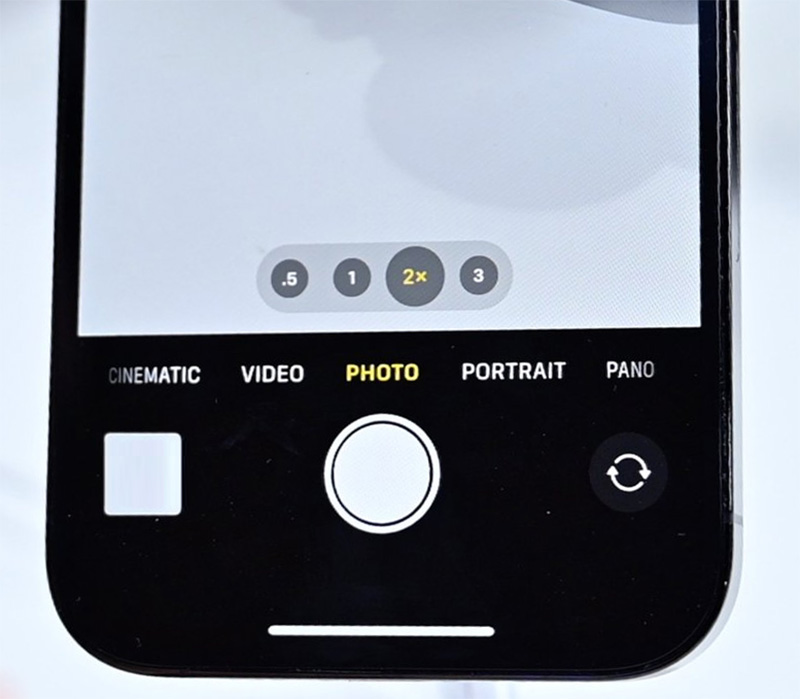
There are four optical-quality zoom levels available on the iPhone 14 Pro and iPhone 14 Pro Max. There is one. 5X using the ultra-wide lens, 1X using the primary wide lens, 2X using the primary lens, and 3X using the telephoto lens.
The theory is that Apple may use the larger, 48MP sensor’s centre 12MP to achieve a 2X zoom without sacrificing image quality. If we go really scientific, there is some quality loss because Apple can’t use pixel binning when this happens, which means the now-smaller pixels collect a little less light.
However, it will provide better images than digital zoom. Digital zoom works by cropping the image rather than altering the optics, resulting in a lower-quality image.
By tapping the circular indications above the shutter button, you can switch between these preset zoom levels. Another little-known secret is that when you tap on any of them, you may hold your finger and slide it up or down.
This gesture will bring up a wheel where you can adjust the zoom level you want, up to 15X digital zoom. The focal length equivalent is shown below the zoom level for the preset zoom levels.
After that, you may either swipe the wheel towards the shutter to get rid of it or wait a few moments for it to go away on its own. Pinching in or out is another alternative, however, it is less handy and blocks the screen.
If you want to photograph in Macro Mode, bring your phone very close to your subject, and then Macro Mode will activate. It can focus within millimetres of the lens. If you don’t want this to happen automatically, you can disable it using a toggle in Settings.
2. Volume Buttons
Starting with the Camera app’s controls, tapping the screen isn’t always the best option. A simple tap can force the phone to move, obscuring your photo accidentally. Apple has addressed this issue by allowing the volume controls to double as easily accessible shutter buttons.
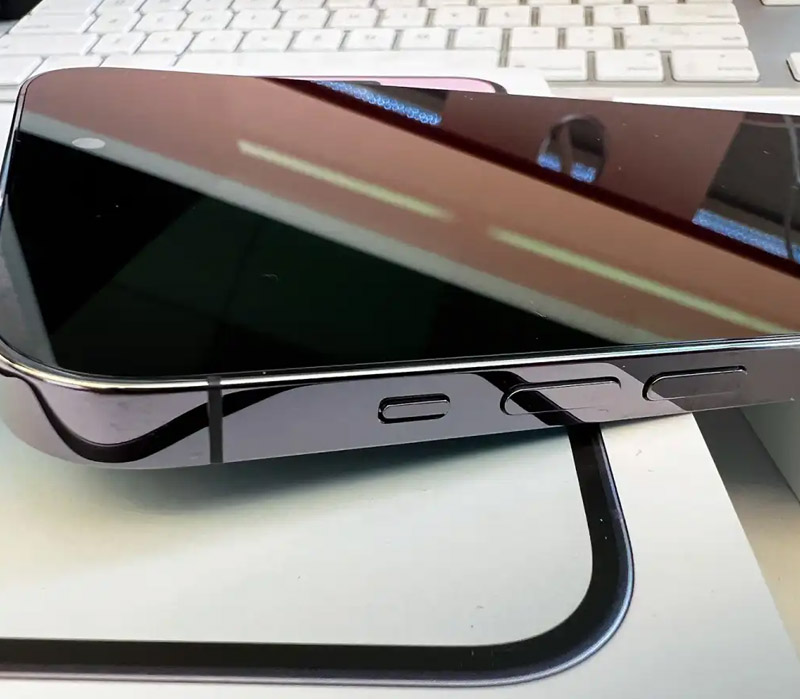
By default, pressing the volume up or volume down button will take a photo. Holding either button will start a video recording. The video capturing will end once you release the button.
You can modify this behaviour by going to Settings. You can enable burst capture by going to Settings > Camera.
Holding the volume up button instead starts recording burst images when this is enabled. When you release the button, the images will no longer be captured.
3. iPhone 14 Pro Max Extra Controls
Additional controls, placed near the top of the phone on either side of the Dynamic Island, will alter depending on your shooting circumstances. The ProRes or RAW indicator, the flash icon, the Night Mode icon or the Live Photo toggle may all be visible.
Aside from this, there is a carrot arrow in the centre of the screen that you may tap to reveal numerous other controls above the shutter. These symbols include the flash control (auto, off, on), Night Mode (shows only when it is dark), Live Photo (on, off), Photographic Styles (five styles to choose from), aspect ratio (4:3, 1:1, 16:9), exposure compensation, timer, and filters.
The iPhone 14 Pro retains Night Mode, which duplicates the effect of a slow shutter speed. Leaving the camera shutter open longer on a typical camera allows more light to hit the sensor, allowing you to snap images in low-light situations. The trick is that you can’t move the camera while it’s taking the picture.
When a low-light scene is detected, Night Mode will automatically activate. The shutter duration will be adjusted depending on how much the phone and subject move. The iPhone’s freehand shutter speed may be limited to two or three seconds. When supported by a tripod, the shutter can remain open for up to 30 seconds.
You may manually adjust the shutter length by touching the Night Mode icon and sliding it left and right. However, if the phone is going too quickly, it will not give you the choice of waiting 10, 15, or 30 seconds.
Although you can apply filters after taking a picture, Photographic Styles are new with the iPhone 13 series. These are introduced throughout the capture process and can be modified to your shooting preferences. If you made changes and don’t like them, tap the undo arrow on the right border to undo them.
In some cases, shooting in RAW may be preferable. These uncompressed photographs take up significantly more space but allow for more clarity in the image, particularly in the highlights and shadows.
You may take 12MP RAW images with the iPhone 14 Pro or use the complete 48MP sensor. When using the entire sensor, the image may have more grain. So only use RAW mode if you know what you’re doing.
4. Apple QuickTake
QuickTake makes it simple to snap photographs, movies, or burst shots in real-time. Tapping the white shutter button will take a picture for you, but holding it will record a video. Without the need to switch to video mode.

Video will be captured as long as you hold the shutter button down and will stop whenever you release it. If you intend to record for an extended period, slide the shutter button to the right, which locks it into video mode and eliminates the need to press the button.
If you wish to take burst photographs, tap the button and quickly pull it to the left. It will now take burst images for as long as you hold it. A counter will show in the original shutter button circle to indicate how many shots were taken.
Also Read: How to fix Red Eyes on iPhone?
5. iPhone 14 Pro Max Video Recording Camera Tips
On the iPhone 14 Pro, Apple has supplied consumers with four video modes – sort of. Timelapse, slo-mo, Cinematic, and regular video modes are available.
When you enter video mode, the resolution and frame rate is displayed in the top-left corner. To change, tap either of the numbers. Different recording resolutions and framerates will be available depending on your video mode, based on what the phone can capture.
Apple updated Cinematic Mode on the iPhone 14 Pro this year to capture video at up to 4K resolution. Previously, it was limited to 1080P HD. When shooting in 4K, you have the option of recording at 24 or 30 frames per second.
If you’ve never heard of Cinematic Mode, it’s similar to Portrait Mode but for video. It will focus on your subject while blurring the rest of the scene. After you’ve finished shooting, you can adjust the focus to accentuate what you want.
You have access to the subject and the simulated aperture when editing. As with Portrait Mode, you can modify the amount of blur in the backdrop by setting the aperture.
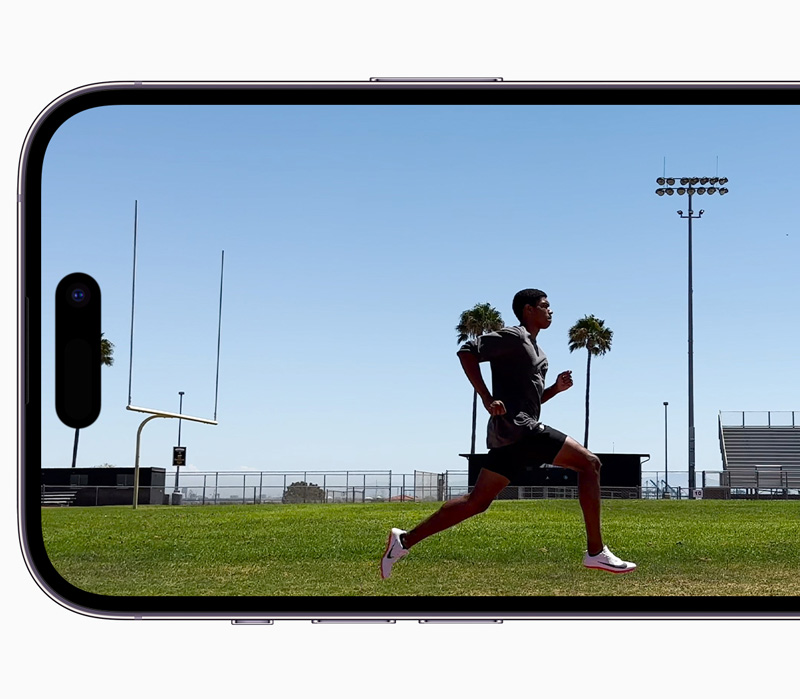
Action Mode is a new feature for iPhone 14 Pro users. In Action Mode, you can take smooth videos while moving quickly. Consider it like capturing a well-stabilised video with a gimbal using only your iPhone.
Simply put your phone in video mode to enable this option, and a new icon will appear at the top. It resembles a guy running, and when activated, you may walk around while still capturing smooth video.
The video in Action Mode is cropped slightly and can be recorded in 2.8K. The crop is required for your phone’s post-shooting stabilisation.
Action Mode requires a lot of light, although there is a mode that allows for low-light support. The stabilising effect will be less effective with this enabled.
6. Start shooting!
Third-party camera apps are always available for iPhone users, but many prefer Apple’s standard alternatives. That is why it is critical for Apple to keep adding capabilities to the default Camera app.
The Camera app has you covered whether you’re shooting in Portrait Mode, taking live shots, or creating a stylish Cinematic Mode video.
Also Read: How to Force Restart iPhone 14 Pro Max